
How to Use Custom CSS on Hugo Site (With Pictures)
After setting up your Hugo site for the first time, next thing to do is to customize it to your own liking. One of the more common things you have to do is to change some of the styling (CSS).
Here’s how to do it.
Note: I use Visual Studio code (VS Code). My IDE of choice. All steps below were executed from VSC. Should be doable as well from a different IDE.
Step by Step Guide (With Pictures)
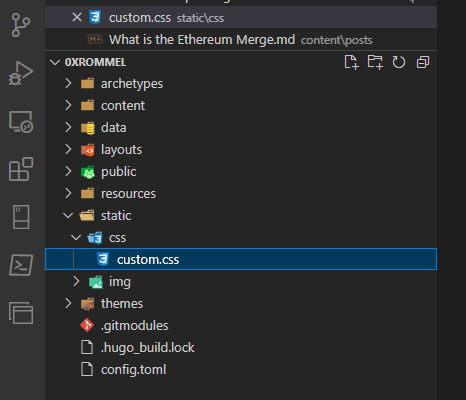
1. Create a custom.css file. Place it in static/css folder inside your project folder.
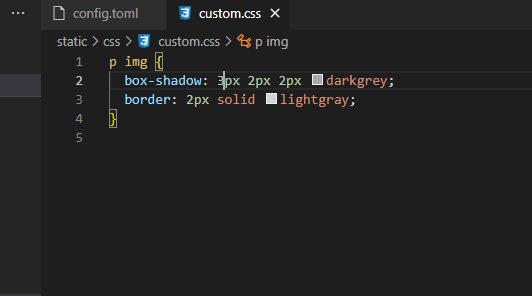
2. Open the custom.css file and type in all your styling changes.
In the screenshot below, you can see that I wanted to put a border and box shadow on all image elements inside a paragraph (p tag).
3. Success!! Images in the post are now enclosed by a border and given a shadow as I wanted.
Styling changes applied. See sample below (yellow highlighted).

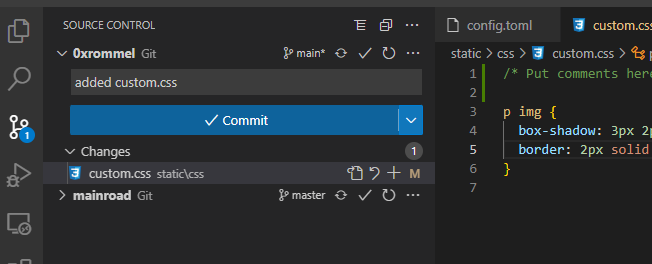
4. Commit your code changes to your local repository and synch up to Github.
Add a comment and click on Commit then Sync it to Github (remote repository)
That’s pretty much it!
Let me know if you have questions.