
How to Set up a Hugo Site In Cloudflare (With Pictures)
Prerequisites
1. You should have a Cloudflare account
- If you don’t have one, it’s easy to register and it’s free to start. It does a have paid premium service but all of the Cloudflare services that we’ll use below are all free.
2. You should have already installed Hugo on your machine
- Try to get the latest Hugo release. If you haven’t installed Hugo yet, check Hugo’s quick start guide to get started.
3. You should already have a Github account
- Register for a new one if don’t have one yet. I don’t have a guide for this yet but it should be easy.
4. You should have VS Code (not mandatory). Any IDE should do.
I used VS Code below and it is already integrated with Github when I create a new repository so it makes a lot of things easier and seamless.
Notes: The below guide is done on a Windows machine. If you’re a using a different OS/platform (Linux, Mac etc.), it should be easy to follow along and make the necessary equivalent commands.
Step by Step
Create a new Hugo project
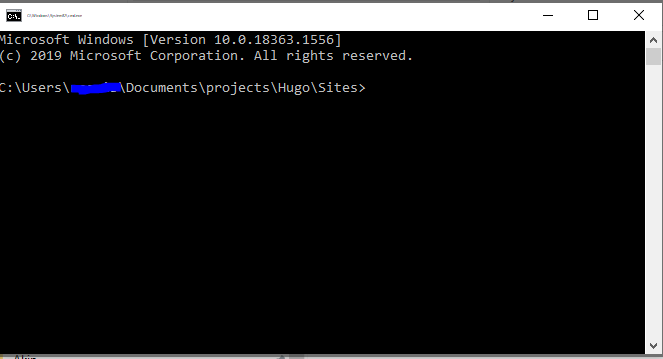
1. Open up a command line terminal and navigate to the folder where you want to place your new site.
I place all my Hugo sites under my project folder (see screenshot below).
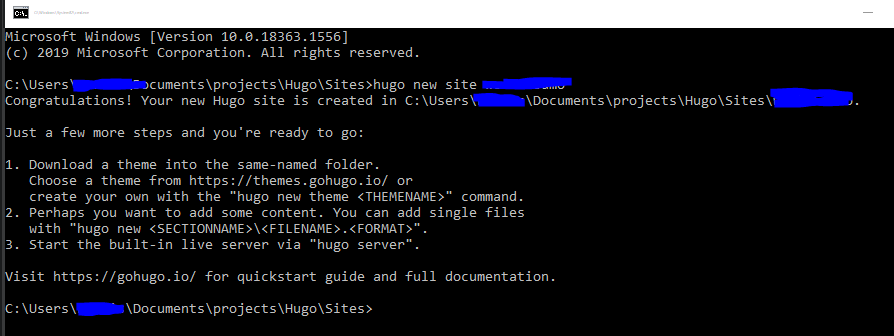
2. Create a new Hugo project. Type the command below:
hugo new site your-site-name-here
Make sure to replace the above “your-site-name-here” text with a name for your new site. The above command will create a new Hugo project folder with basic Hugo site folder structure.
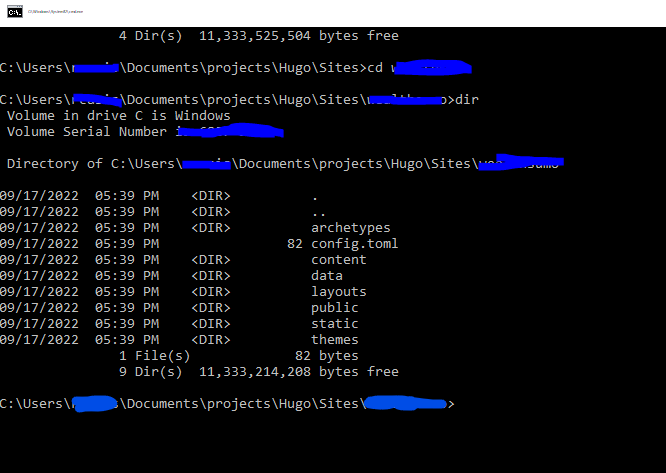
3. Navigate to the folder of the newly created Hugo project.
Create a new repository for your site/project
4. Create a new repository for your site. Run the git init command.
git init
5. Download and use a Hugo theme for your site.
Important! Always check the theme’s quick start page. It would usually contain instructions on how to install the theme. It could be different from below and I suggest that you follow it instead.
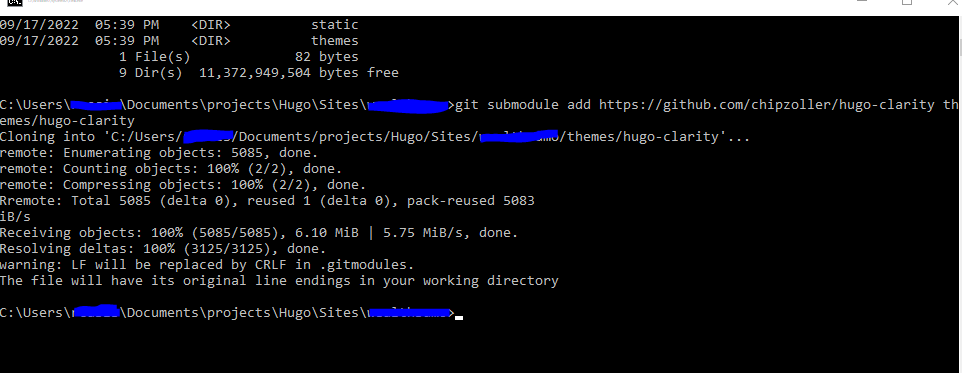
For this tutorial, I am using the Clarity theme. Feel free to use other themes. Some of them are in https://themes.gohugo.io/. Check them out. I’d suggest pick some simple themes (or the one below) just to lessen possible complexity. Themes can be changed in the future as needed.
git submodule add https://github.com/chipzoller/hugo-clarity themes/hugo-clarity

git submodule update --init --recursive
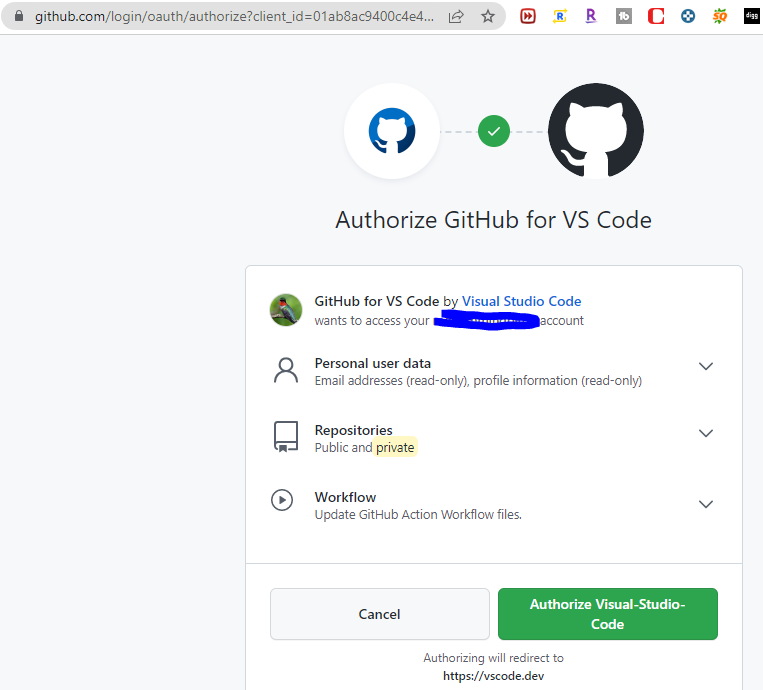
6. Commit project changes into your repository
Open your favorite IDE. I use Visual Studio code to do this.
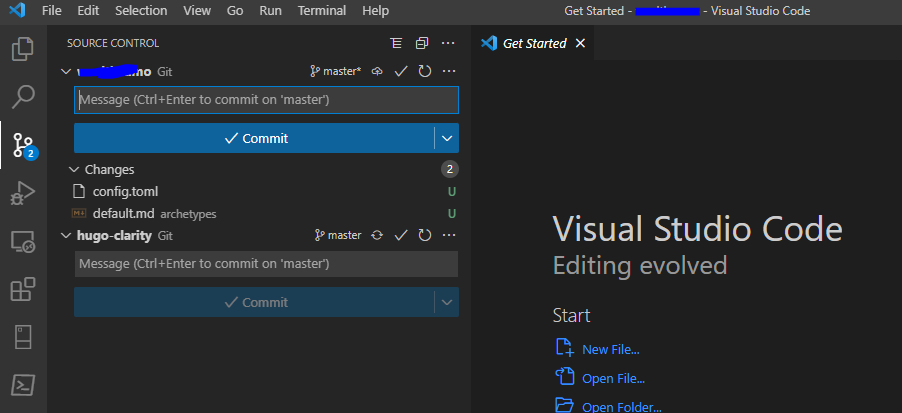
Automatically, it is asking me if I want to create a new remote repository in GitHub. Yes, I like that so I authorize Github access to VS Code so it can do its thing.
Create some content and set up your Hugo theme
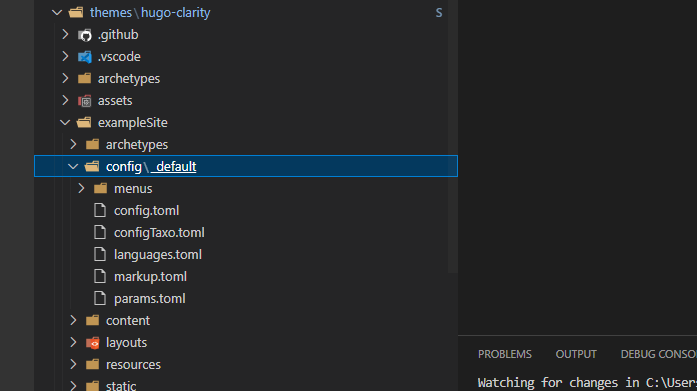
7. Follow directions from your theme on how to configure
For most simple themes (ex: mainroad), you just need to copy the default configuration file (config.toml) from the theme directory and replace the config.toml file in the project directory. The Clarity theme is a little different. You need to copy the whole config folder from the theme directory to the project directory.
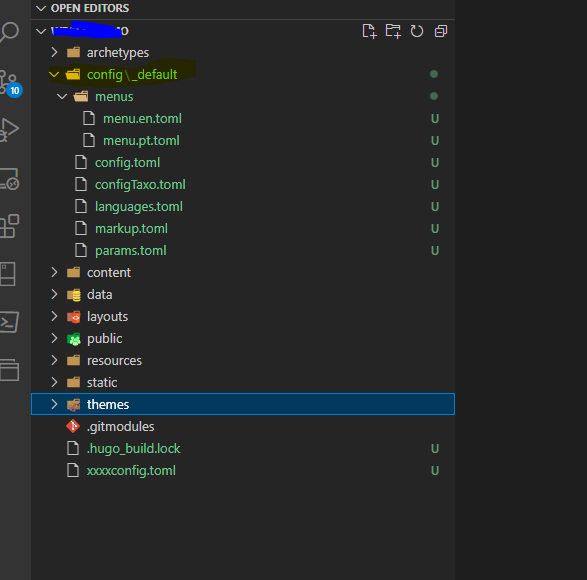
Copy from:
Paste To:
Check if your site is up and working
8. Check and see and how your site looks like.
In VS Code, go to Terminal tab and run:
hugo server
The above command will launch a local Hugo server allowing you to see how your site looks like as you edit. Pretty cool!
9. Open a browser and type URL : localhost:1313
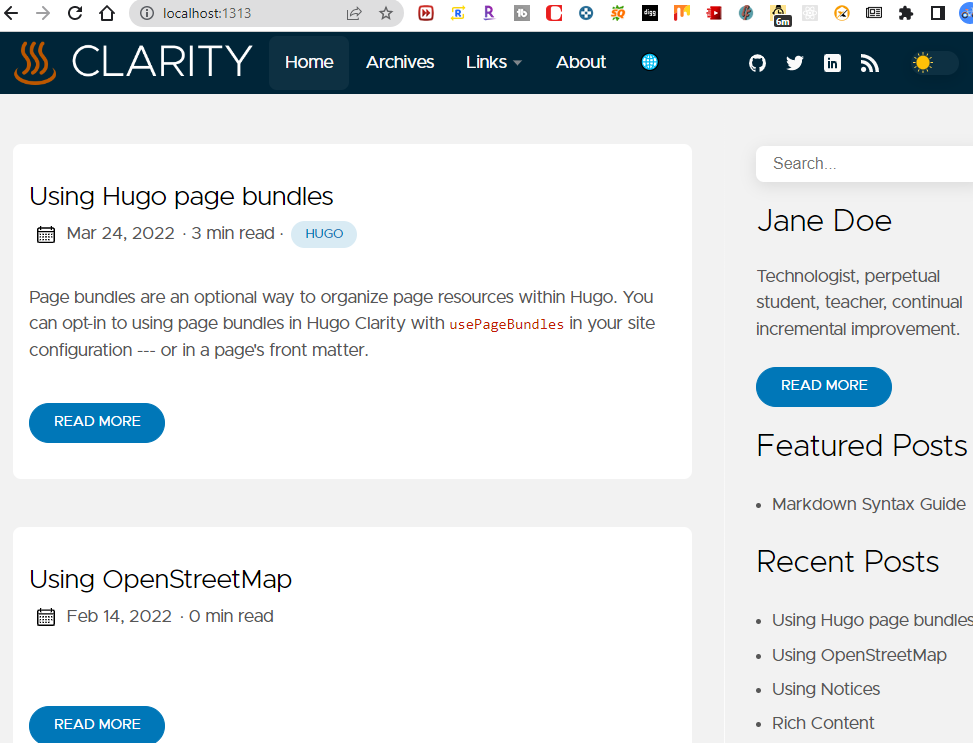
The page will probably look like below. It’s good progress but as you can see there is no styling applied. It’s because the CSS is being blocked because of SRI (Subresource Integrity) issue. See troubleshooting below for the fix (temporary).
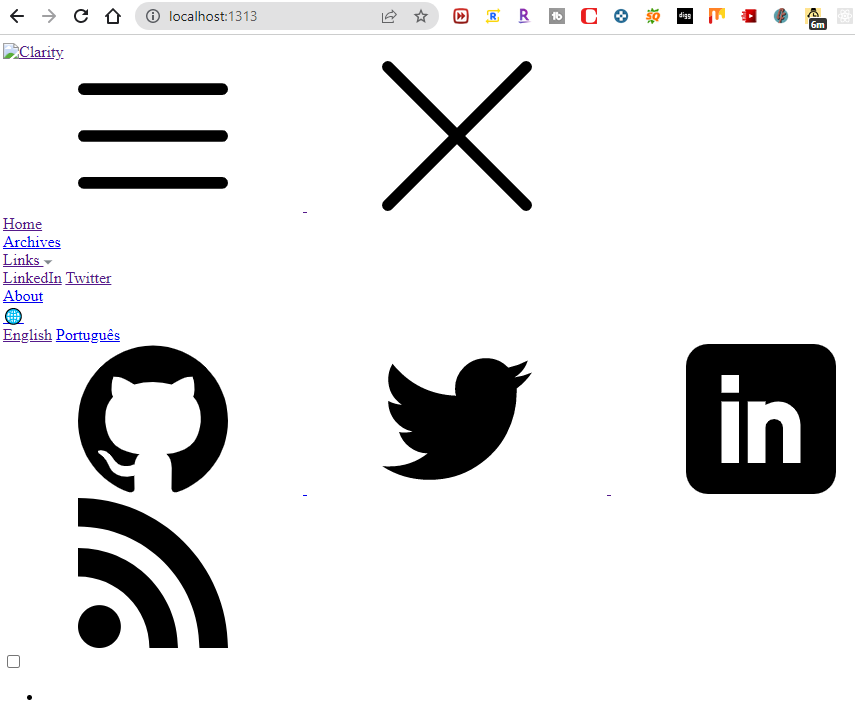
What should show up
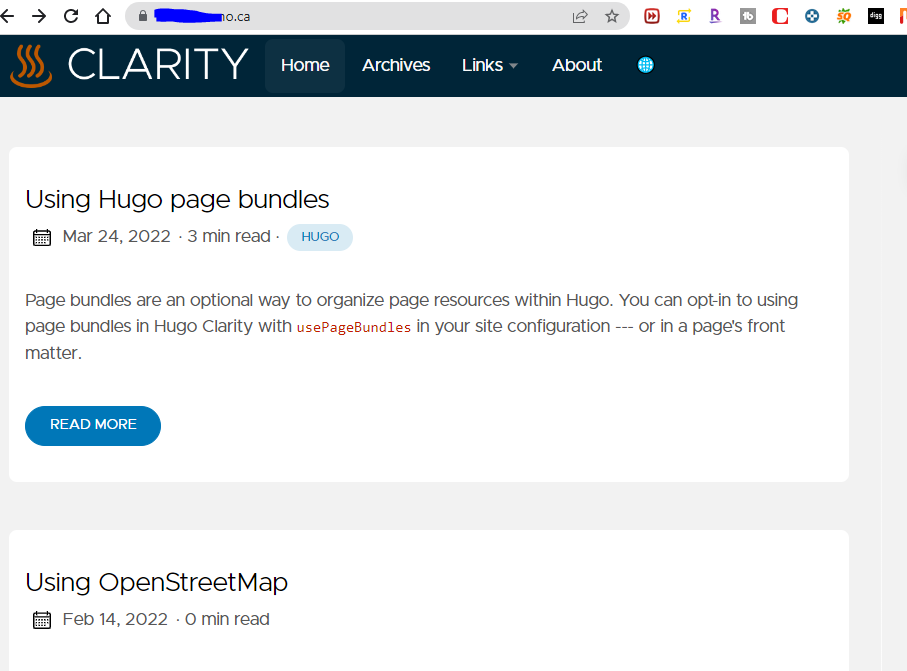
If you are seeing the below page, then you’ve probably followed the theme (Clarity) guide. You’re good to go to the next step.
Troubleshooting for the CSS issue previously:
-
As advised by the theme creator, copy the examplesite folder from the theme. It would give your empty site some content similar to what’s in the demo site.
-
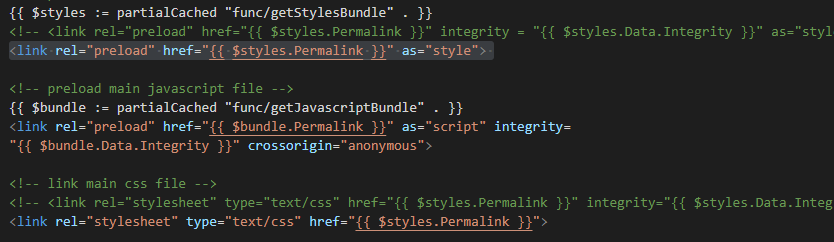
Update head.html file to remove CSS Integrity attributes.
- Copy head.html from the theme’s layouts\partials folder and paste it to layouts\partials on the project folder

-
Remove Integrity and Crossorigin attributes/value
Create a new Cloudflare Project and Connect your Github Repo
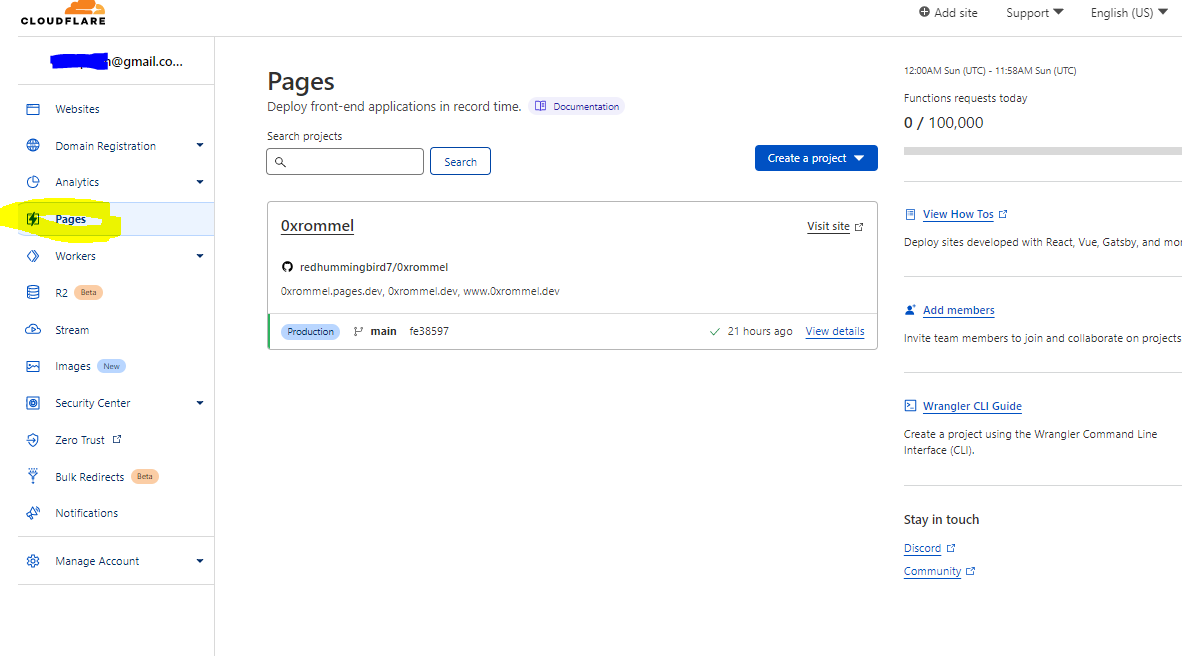
10. Log into your Cloudflare Account and go to the “Pages” dashboard to create a new project.
Click on the blue “Create a project” button.
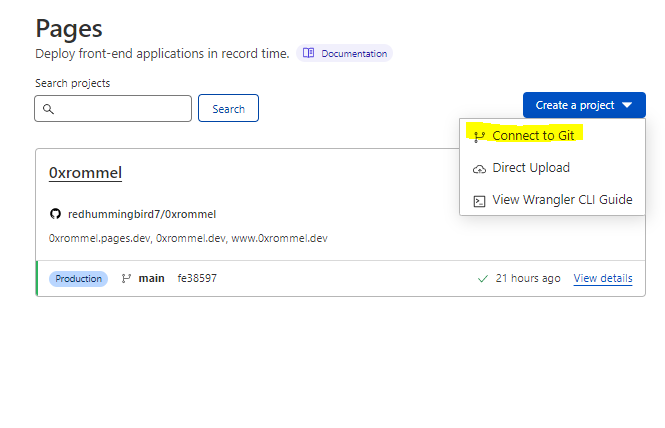
11. Connect your Cloudflare project to your Github repository.
Click on the “Connect to Git” option on the dropdown.
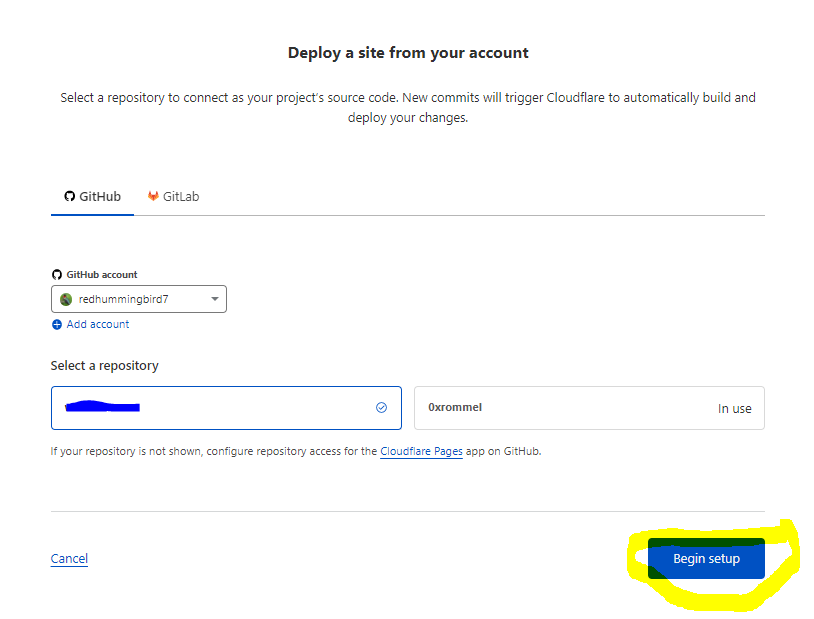
12. Select your repository to connect to.
I use Github. Select the Github account and the specific project repository. click on blue “Begin Setup” button.
Configure Cloudflare Pages so it can build your Hugo Site
13. Configure your Hugo Build and Deployment settings
Use Hugo as Framework preset and it will automatically fill the other fields.

14. Successful Hugo Cloudflare Build!!!!
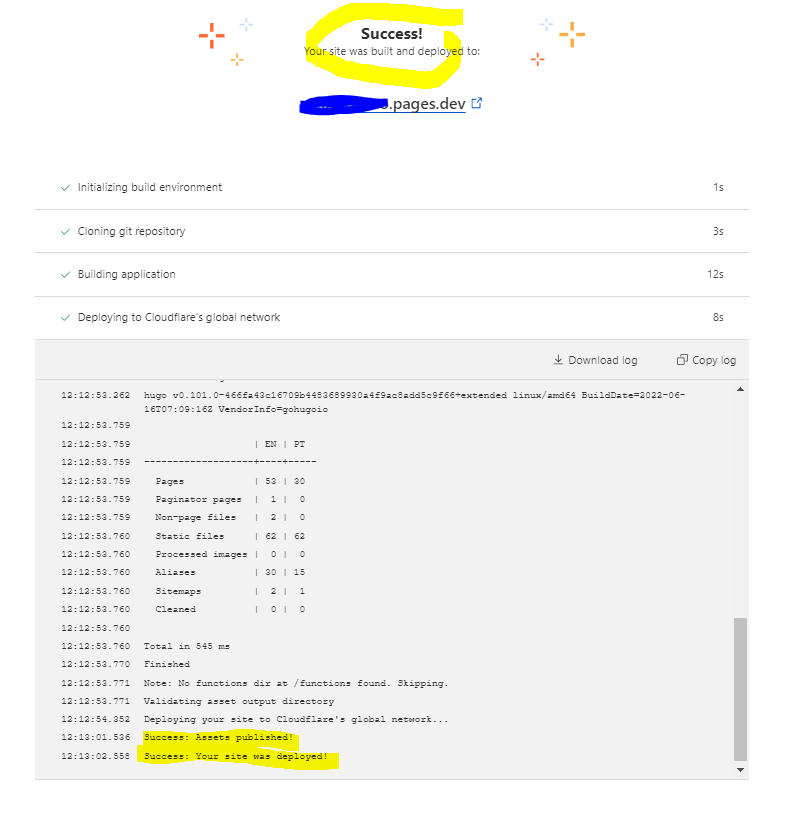
Note: Before I got a successful build, I had to lower the version of Hugo as the theme I used is giving me an error. If this happens to you, lower the Hugo version by going back one step and update “Build Setting”. Create an environment variable named: HUGO_VERSION. Value that worked for me is 0.101.0

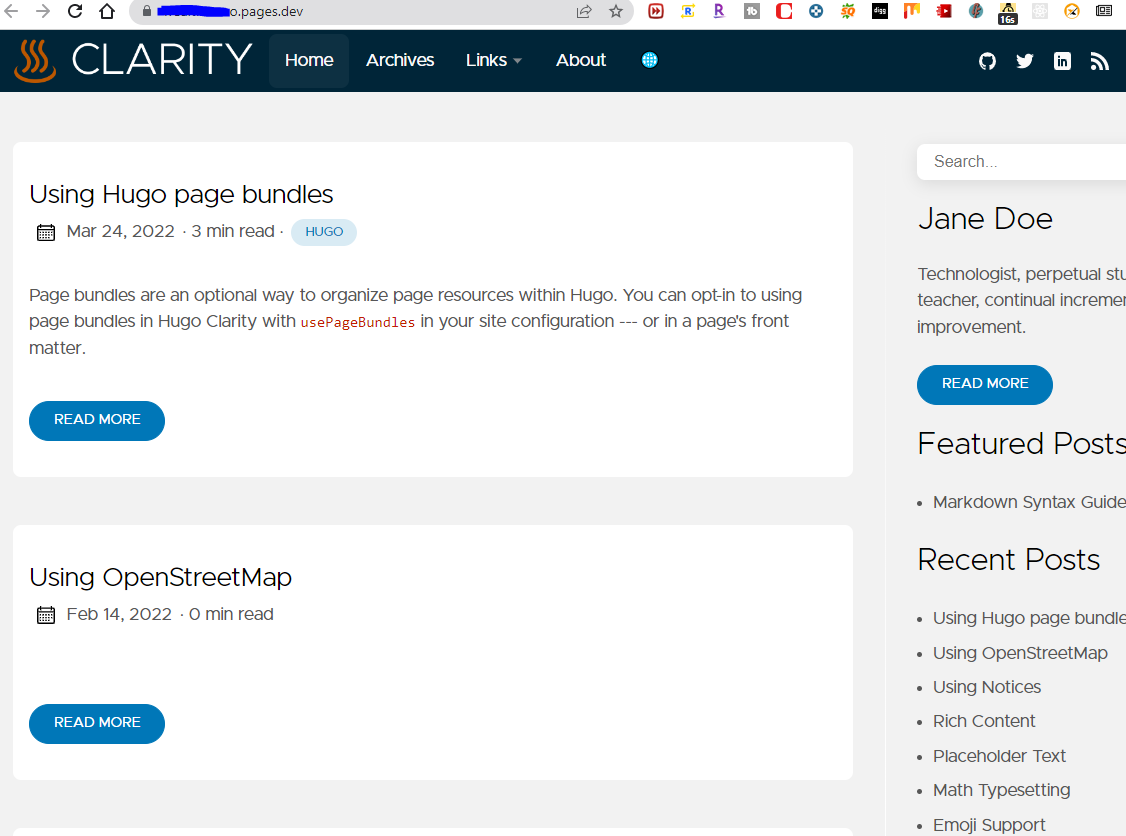
15. Your site is now hosted in Cloudflare!!
Cloudflare gives you a default web address as your-site-name-here.pages.dev. Type it in a browser and you should see something like below.
Note: You can stop here if you’re fine using Cloudflare Pages' default URL. If you want to use your own domain and point it to your Cloudflare Pages site, follow along below:
Use your own domain for your Cloudflare Pages
16. In your Cloudflare account, navigate to the Pages dashboard.
You should see your new site listed here. Click on your site in the list.

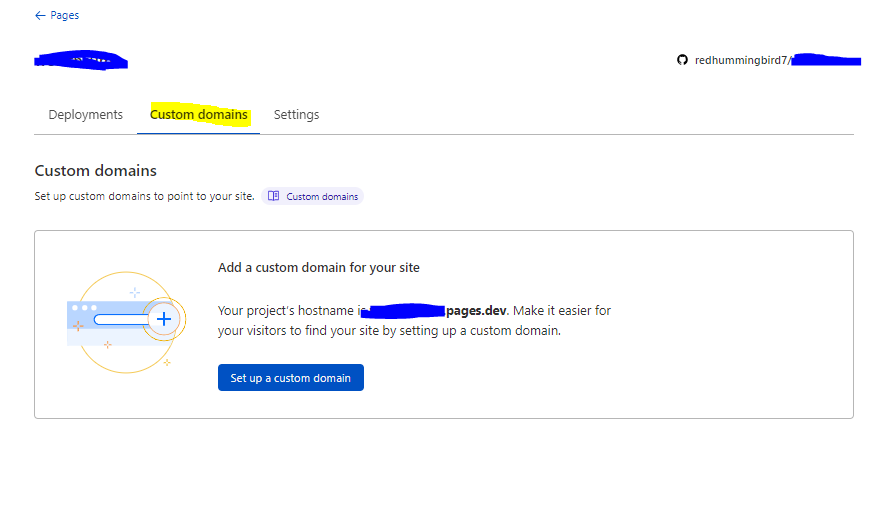
17. Click on the “Custom domains” tab to set up your custom domain.
Click on the blue “Set up a custom domain” button.
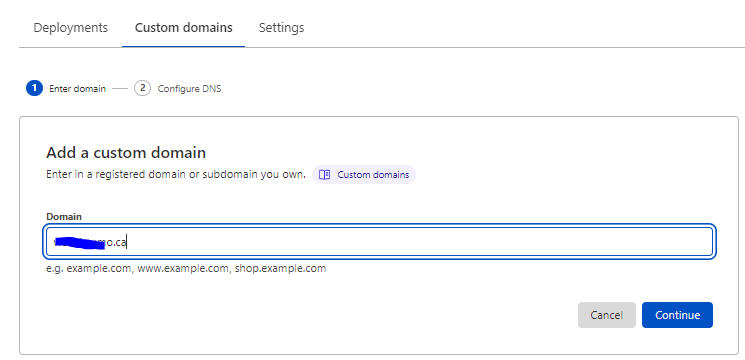
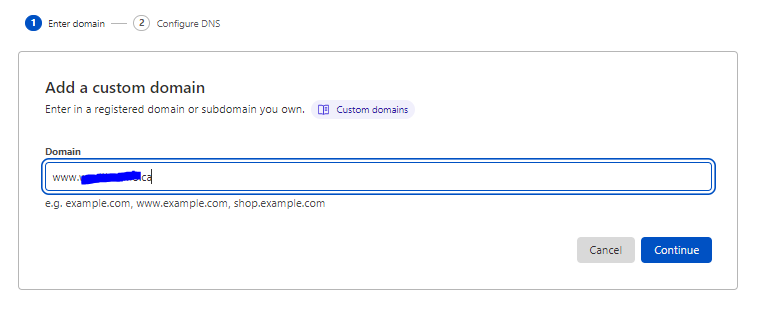
18. Type your domain name in the Domain box and click on Continue button.
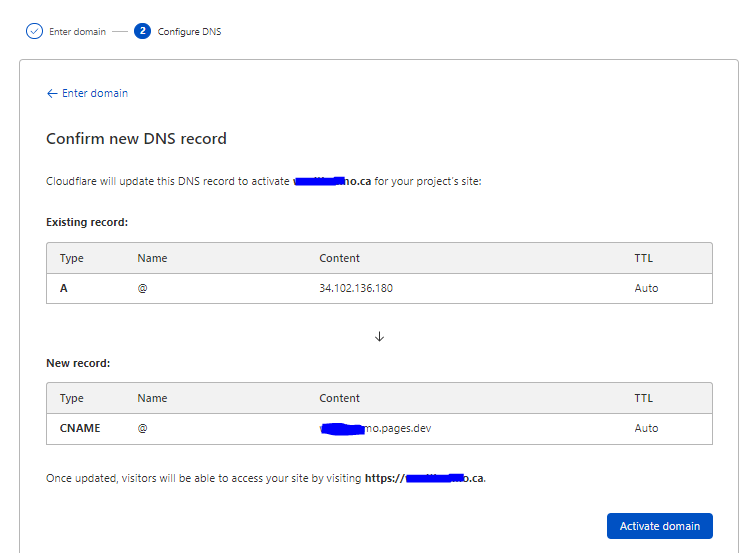
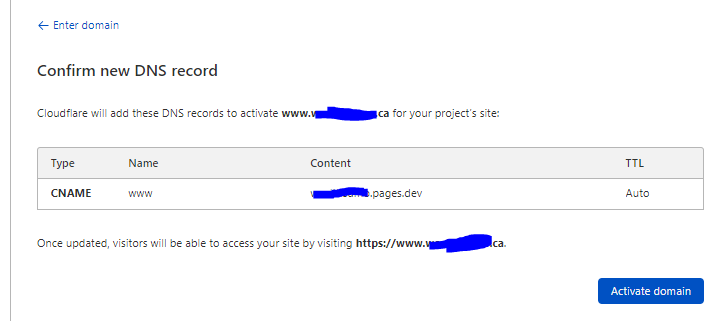
19. Confirm DSN changes and click on the “Activate domain” button.
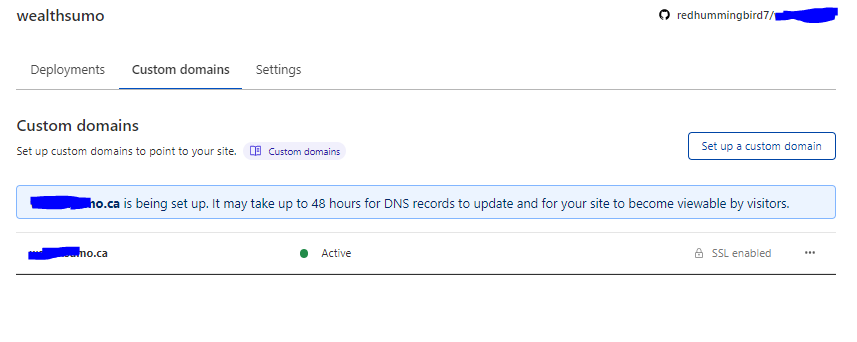
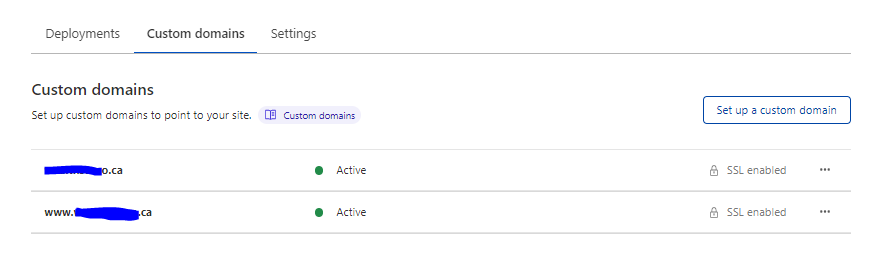
20. Success!!! Your custom domain is now active!
21. Open a browser and type your URL.
You should see your Cloudflare Pages site.
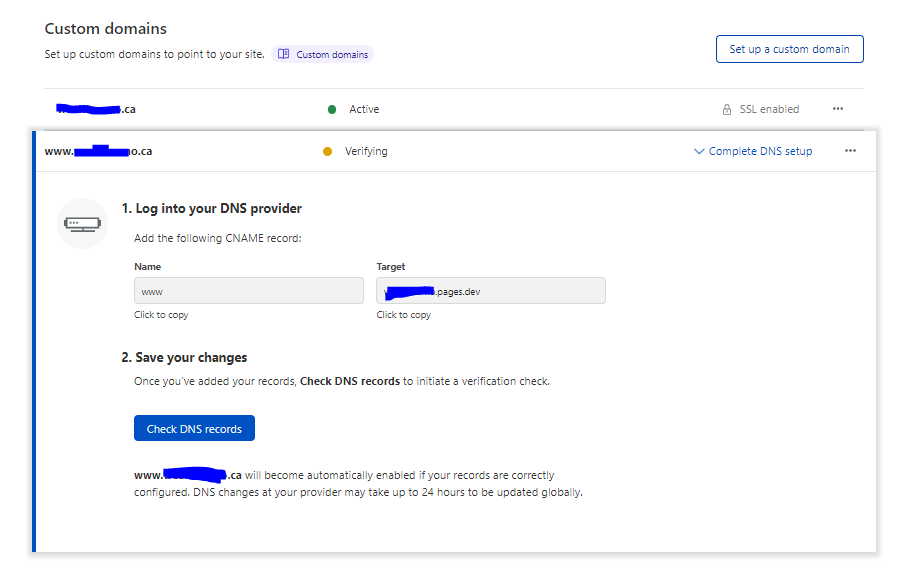
22. Do the same for the www. domain prefix.
Add www URL as custom domain.
Confirm the DNS record and activate it.
Note: Sometimes it takes time and will ask you to do the DNS name changes yourself like in below. But, I just waited a little bit more and it was able to activate without me changing DNS record myself. (maybe because Cloudflare is also my Name Registrar for the domain)
Success!
23. That’s It! The end! Hope this helped a little. Let me know if you have questions.